目錄表
Build and install ubuntu for RSC-IMX61
Here you can find instruction to setup development environment for ubuntu source code for RSC-IMX61 and the way to install ubuntu on system. With this guideline, user will be able to setup the system easily and test all the functions with the system.
Availability
RSC-IMX61 Quad core or Dual lite
Generating RSA Keys
Use command below to generate RSA Key :
#ssh-keygen -t rsa
You can find “id_rsa.pub” in path below. Please send it to us by email to get access right of Avalue GIT server.
#/home/username/.ssh/
Download Source code and cross compiler tool from Avalue git server
#git clone gitlab@aes.avalue.com.tw:AIB-IMX6/AIB-IMX6-Kernel.git -b 3.0.35-4.0.0
Setup Build Environment
To build U-Boot & kernel source code for RSC-IMX61, you will need to install following packages on Ubuntu. 64bit users have to make sure 32bit libraries has been installed for their system.
| Distribution | packages (sudo apt-get update ; sudo apt-get install xxx) |
|---|---|
| Ubuntu 12.04 | ia32-libs u-boot-mkimage |
| Ubuntu 14.04 | libc6:i386 libstdc++6:i386 libncurses5:i386 zlib1g:i386 u-boot-tools |
Compile U-Boot & Kernel Source code
After you download source code from Avalue GIT server, you will find a folder named “AIB-IMX6-Kernel”. Here is description for each folder & files inside.
| Item | Description |
|---|---|
| kernel | folder with kernel source code inside |
| Makefile | Makefile for compile u-boot & kernel image |
| u-boot | folder with u-boot souce code inside |
Use command below to compile u-boot & kernel
#make aib-imx6 -j4
Use command below to compile u-boot only
#make aib-imx6-uboot -j4
Use command below to compile kernel only
#make aib-imx6-kernel -j4
Use command below to clean all the binary files in source code
#make clean
After you finish to compile source code, you will find files below. Here are description for each files
| Item | Description |
|---|---|
| u-boot-quad-2g.bin | u-boot for RSC-IMX61 Quad core with 2GB DDR3L memory |
| u-boot-quad.bin | u-boot for RSC-IMX61 Quad core with 1GB DDR3L memory |
| u-boot-solo.bin | u-boot for RSC-IMX61 Dual Lite with 1GB DDR3L memory |
| uImage | kernel file for RSC-IMX61 |
You will have to copy image files to path \mfgtool-RSC-IMX61\Image\RSC-IMX6\Linux of your Mfgtool folder
Bootloader : U-Boot
To modify default setting for u-boot command, you can modify /AIB-IMX6-Kernel/u-boot/board/freescale/mx6_aib/mx6_aib.c
Linux Kernel
Please get into folder core/kernel and use command below to load default configuration of kernel and config it
| Command | Description |
|---|---|
| #./run.sh aib-imx6 -j4 | Command to build kernel for RSC-IMX61 |
| #./run.sh menuconfig | Command to setup kernel configuration |
| #./run.sh modules | Command to build kernel modules |
| #./run.sh clean | Command to clean binary files in kernel source code |
Install System into eMMC
Please download Mfgtool(Ubuntu 12.04 armel) from here.
or
Download Mfgtool(Ubuntu 14.04 armhf) from here.
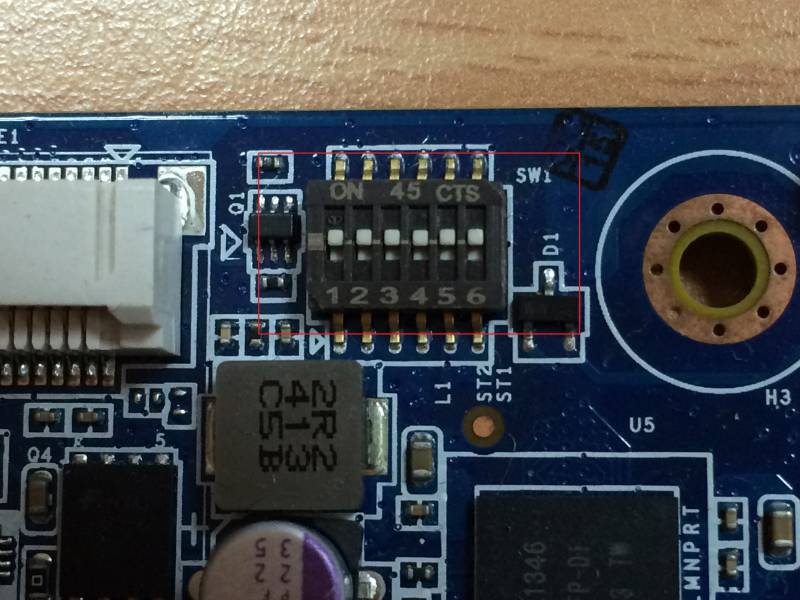
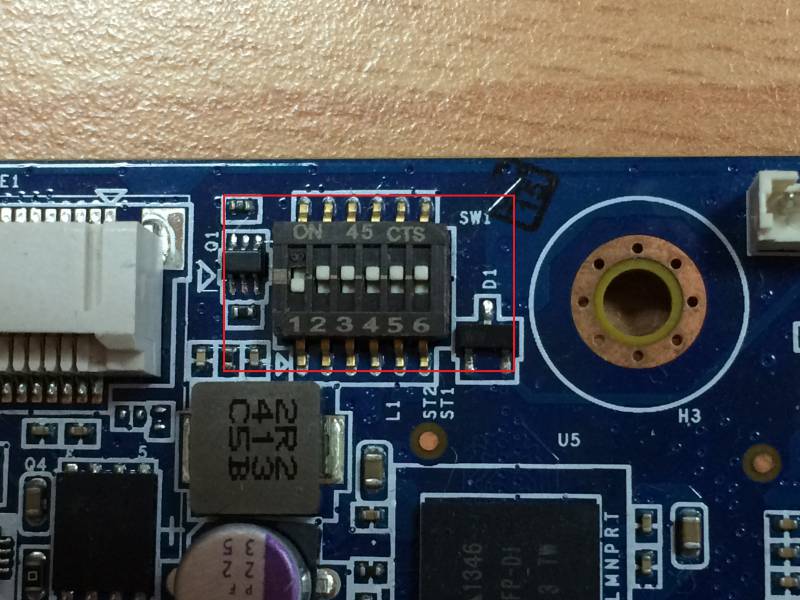
1. Set SW1 on RSC-IMX61 as below to download mode
2. Use mini-USB cable to connect JUSB1 on RSC-IMX61 to Windows system.
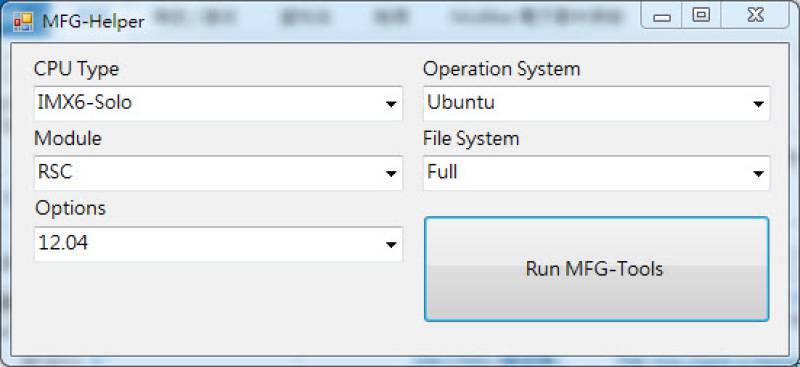
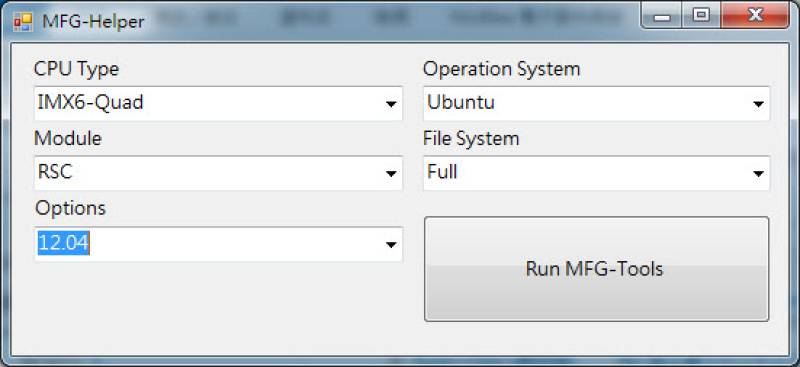
3. Run MFG-Helper.exe in path \mfgtool-RSC-IMX61\Mfg-RSC-IMX6 and do the setting as below to flash image file.
With RSC-IMX6D, setting of MFG-Helper.exe will be like this.
With RSC-IMX6Q, setting of MFG-Helper.exe will be like this.
Then Click “Start” to flash image

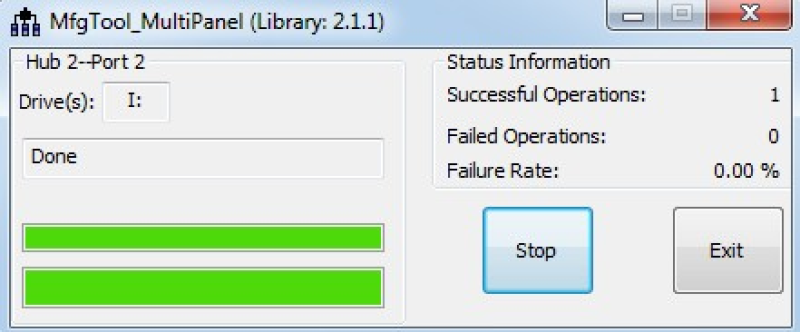
4. It will show “Done” after finishing the flash process. Please click “Stop” and “Exit” to close it.
5. Set SW1 as below to boot from eMMC
6. User name / Password of Ubuntu12.04 armel ⇒ linaro / linaro
User name / Password of Ubuntu14.04 armhf ⇒ ubuntu / ubuntu
Install System into Micro SD Card
Here is the procedure to create a bootable Micro SD card for RSC-IMX61D.
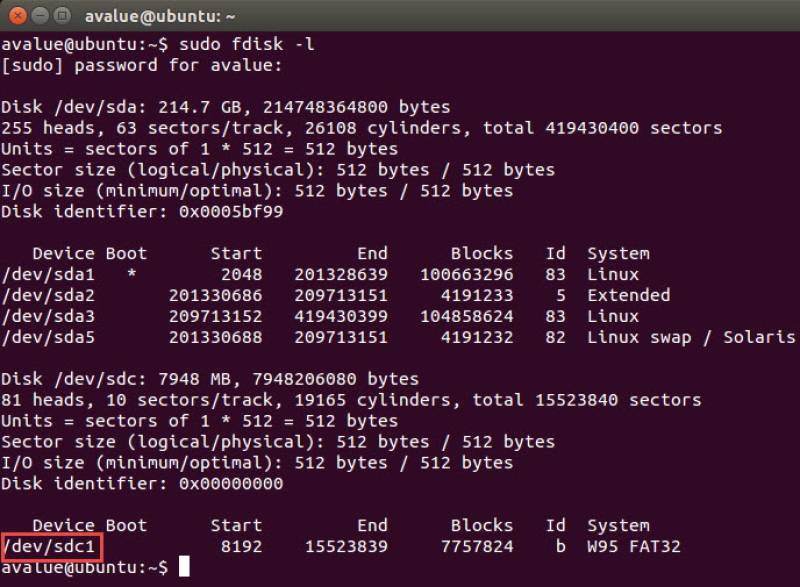
1. Plug in Micro SD card on card reader of your Linux development platform, and check device node of it by command “sudo fdisk -l”
As you can see below, device mode of my Micro SD card is “/dev/sdc1” (“/dev/sdc” means disk, “/dev/sdc1” means partition)
2. Use command below to umount /dev/sdc1 and install u-boot into Micro SD card.
#sudo umount /dev/sdc1
#sudo dd if=u-boot-solo.bin of=/dev/sdc bs=512 seek=2 skip=2 conv=fsync
3. Use command below to install kernel into Micro SD card.
sudo dd if=uImage of=/dev/sdc bs=512 seek=2048 conv=fsync
4. Copying the root File System (rootfs)
First, a partition table must be created. If a partition already exists and it is big enough for the file system you want to deploy, then you can skip this step. To create a partition, at offset 16384 (in sectors of 512 bytes) enter the following command:
#sudo fdisk /dev/sdc
Please note that On most Linux host operating systems, SD card will be mounted automatically upon insertion. Therefore, before running fdisk, please make sure that SD card is unmounted (via 'sudo umount /dev/sdc').
Type the following parameters (each followed by <ENTER>):
u [switch the unit to sectors instead of cylinders]
d [repeat this until no partition is reported by the 'p' command ]
n [create a new partition]
p [create a primary partition]
1 [the first partition]
16384 [starting at offset sector #16384, i.e. 8MB, which leaves enough space for the kernel, the boot loader and its configuration data]
<enter> [using the default value will create a partition that spans to the last sector of the medium]
w [ this writes the partition table to the medium and fdisk exits]
The file system format ext3 or ext4 is a good option for removable media due to the builtin journaling. Run the following command to format the partition:
#sudo mkfs.ext3 /dev/sdc1
Or
#sudo mkfs.ext4 /dev/sdc1
Then mount the SD card partition and copy the target file system to it.
Mount partition to a folder :
#mkdir /home/user/mountpoint
#sudo mount /dev/sdc1 /home/user/mountpoint
Extract rootfs package to Micro SD card: extract ubuntu.tar.bz2 (You can find this file in \mfgtool-RSC-IMX61\Image\Filesystem) to /home/user/mountpoint
#sudo tar jxvf ubuntu.tar.bz2 -C /home/user/mountpoint
#sudo umount /home/user/mountpoint
5. Setup serial connection between RSC-IMX61 & Linux development platform.
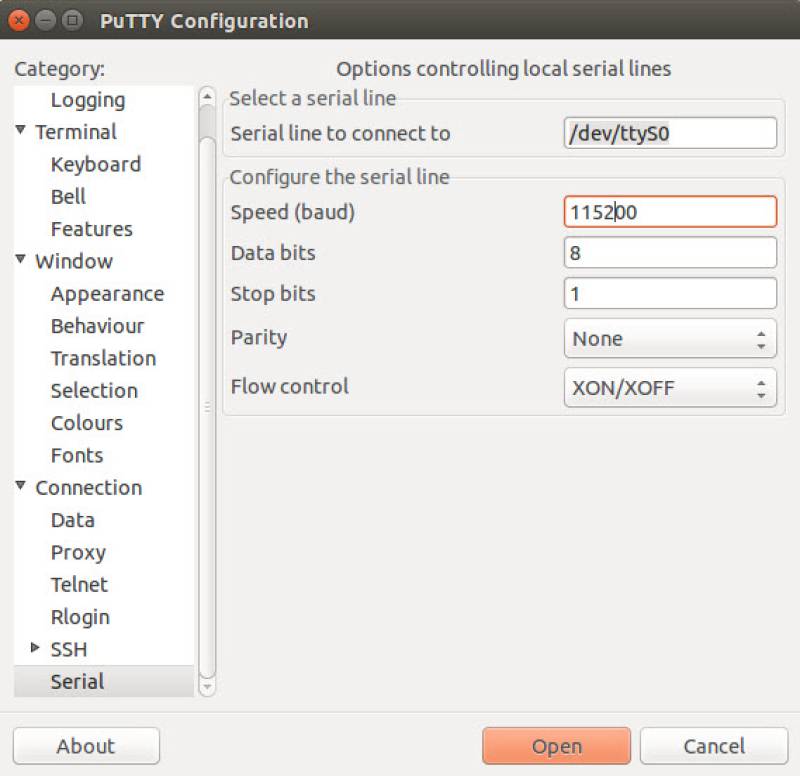
Connect serial console of RSC-IMX61 to your Linux development platform. For example, we use “putty”. Here is my setting of serial port.
If you do not have putty with your system, use command below to install it.
#sudo apt-get install putty
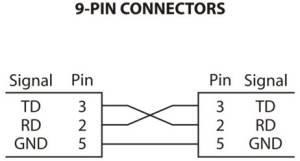
Default serial console of RSC-IMX61 is JCOM1. Please use the way below to connect signals between Linux development platform and RSC-IMX61.
6. Modify bootloader setting to access rootfs on Micro SD card.
Plug the Micro SD card on RSC-IMX61D and set SW1 as below :
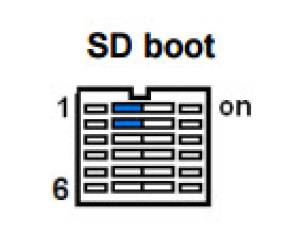
Power on RSC-IMX61 and press “enter” of Keyboard on your development platform immediately. You will see picture like below on putty.
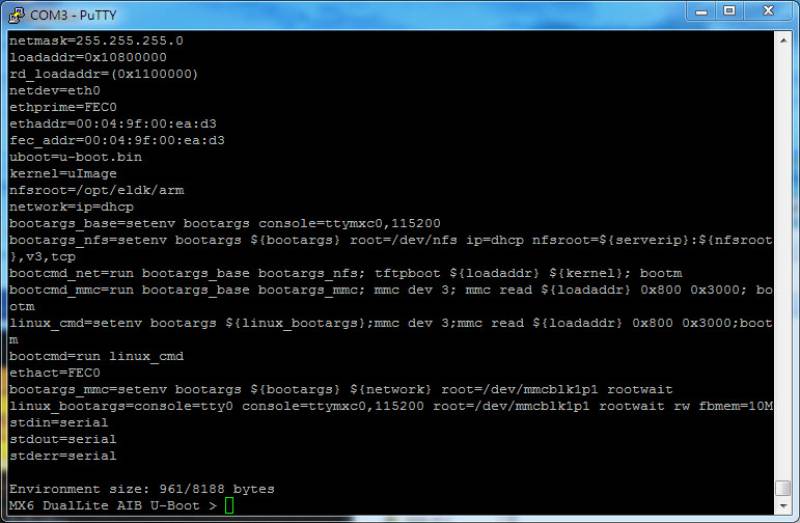
Please use command below to boot from Micro SD :
MX6 DualLite AIB U-Boot >setenv bootargs_mmc 'setenv bootargs ${bootargs} ${network} root=/dev/mmcblk1p1 rootwait'
MX6 DualLite AIB U-Boot >setenv linux_bootargs 'console=tty0 console=ttymxc0,115200 root=/dev/mmcblk1p1 rootwait rw fbmem=10M'
MX6 DualLite AIB U-Boot >saveenv
MX6 DualLite AIB U-Boot >boot
Then you will be able to boot from SD w/o problem.
You can also refer to original Linux BSP documentation from NXP here.